Opening files and Tiling viewers with TuiView
Introduction
TuiView is a simple raster viewer written in Python. Although it is simpler than other GIS packages, it does have some features not commonly found elsewhere. These include: geolinking viewers, default stretch for files based on their attributes and powerful raster attribute table (RAT) manipulation.
This article covers some of these basic features. TuiView can be installed via conda-forge.
Tiling
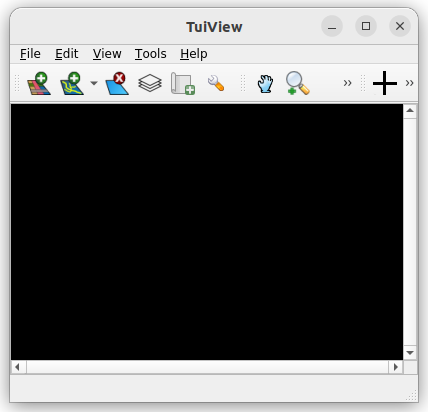
Start TuiView at the command line by typing tuiview. A single window then appears
which has buttons to open files ( )
and start other windows (
)
and start other windows ( ):
):
Alternatively, raster files can be dropped into the window and they will be opened.
Use the Zoom In( ),
Zoom Out (
),
Zoom Out ( )
and Pan (
)
and Pan ( )
to move around a loaded image.
)
to move around a loaded image.
Note that by default, all windows zoom and pan together. So when you are looking at
an area with one, the others will be showing the same area. This behaviour can be
disabled for a viewer by pressing the  button.
Alternatively you can start tuiview with images already loaded from the command line
like this:
tuiview --separate a.tif b.kea c.kea d.kea
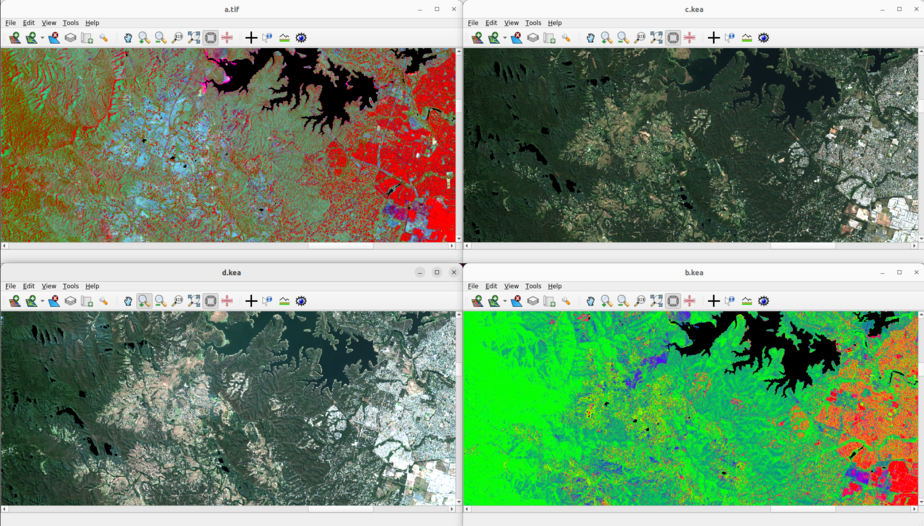
This will create 3 windows, each with 1 file loaded. Without the --separate flag,
all 3 files will be loaded into the one viewer.
Normally these windows will open on top of one another. Arranging each viewer so all
can be seen is tedious so TuiView has built in functionality to do this, accessed
via the “File” menu by selecting “Tile Windows…” or pressing Ctrl+I:
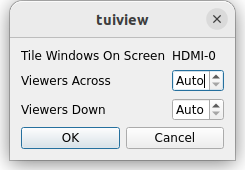
By default, TuiView will determine the numbers of viewers across and down that is best for the number of viewers you have started - this can be overridden as desired. Also, the windows on the current monitor are tiled by this method. If you have more than one monitor, move all the windows you want to that monitor and select “Tile Windows…” on a viewer on that monitor.
TuiView chooses the window to be tiled at each location by finding the window that is closest already. If you have a particular order you want the viewers to be tiled in then move them into a rough location and TuiView will snap them to a tiled location.
Stretching
If you wish to change the stretch on an image, click the  button, or select “Stretch” from the “Edit” menu. Alternatively you can type Ctrl+T. This brings up the stretch window as a docked sub window as shown below:
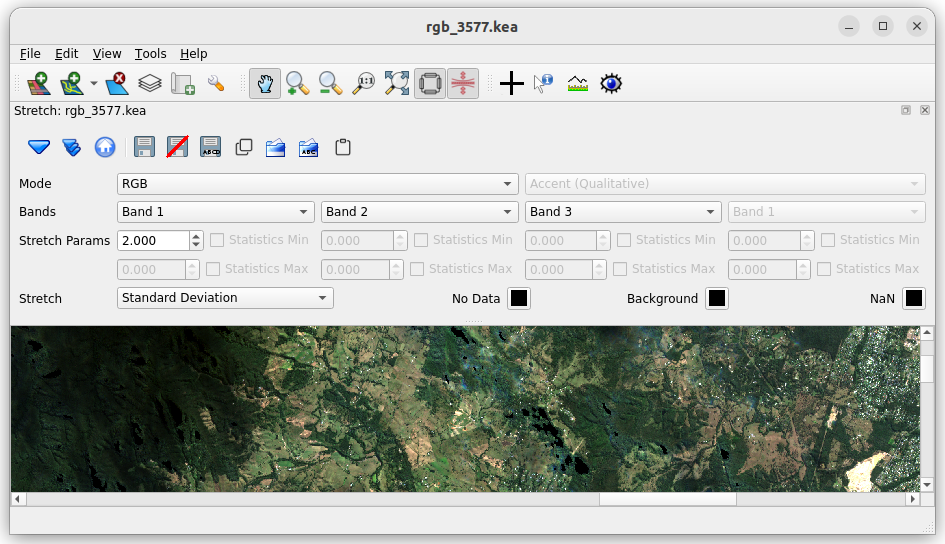
Make changes to the stretch and click  to apply
the stretch to the top loaded image in the window.
to apply
the stretch to the top loaded image in the window.
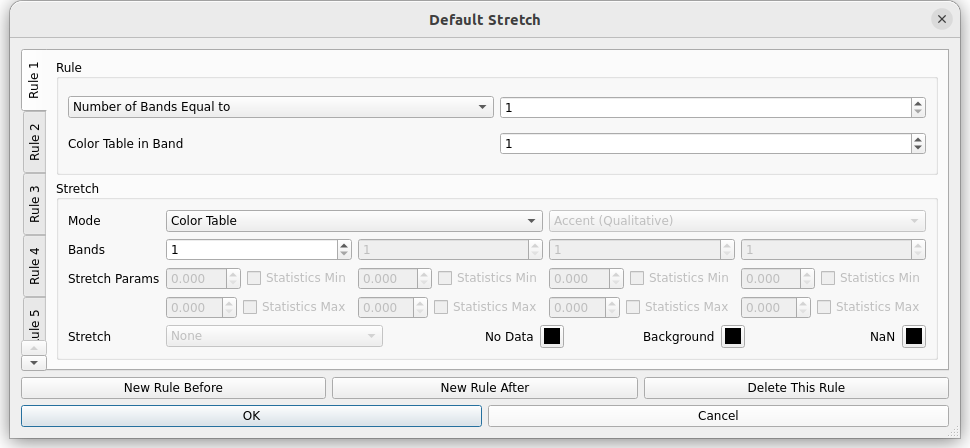
If you use common stretches for your files, you may wish to configure these in the Default Stretch window (accessible from the “File” menu or Ctrl+D). This window is shown below and can be used to configure the default stretch that TuiView uses when it opens a file. Note that you can create a number of rules based on the attributes of a file (number of bands and whether there is a colour table present) and TuiView uses the stretch associated with that rule.
Note that with the stretch window, you can save and restore the stretch to a GDAL file, a text file and the clipboard. This allows you to see images in the same way as colleagues.
Saving Viewer State
What happens if you spend ages setting up your viewers one day, but then you need them
set up again in the same way later? TuiView is able to save the state of all its
windows so it can be restored later. Select “Save State of All Viewers” from the “File”
menu. You will be prompted to create a .tuiview file. TuiView 1.3.6 and later has
an option here to periodically save the state at an interval chosen by the user to
guard against crashes and token expiry on cloud storage.
To restore the previous state select “Load State of Viewers” from the “File” menu and
you will be prompted to select the .tuiview file saved above. Alternatively, you can use the
--savedstate command line option with the path to the .tuiview file:
tuiview --savedstate ~/myproject.tuiview
Note: the paths saved in .tuiview files are relative.
This is so that the .tuiview file and image files can
be moved to another location on a different machine. This
matters when you start tuiview with --savedstate
- this should be from the same place as when you created it.
What happens if you want to get an image of what TuiView is showing for attaching to an email or report? Well TuiView has an option here too. You can either save a .png/.jpg file (with a world file) or a GeoTiff with embedded georeferencing information by selecting “Save Current Display” from the “File” menu. This will prompt you for a path and and type. If you need the image in your clipboard, select “Save Current Display to Clipboard” from the “File” menu and the current display will be put into the clipboard for pasting into another application.
Layer Window
Press the  button to access the Layer Window. This shows all the files that are loaded in the current
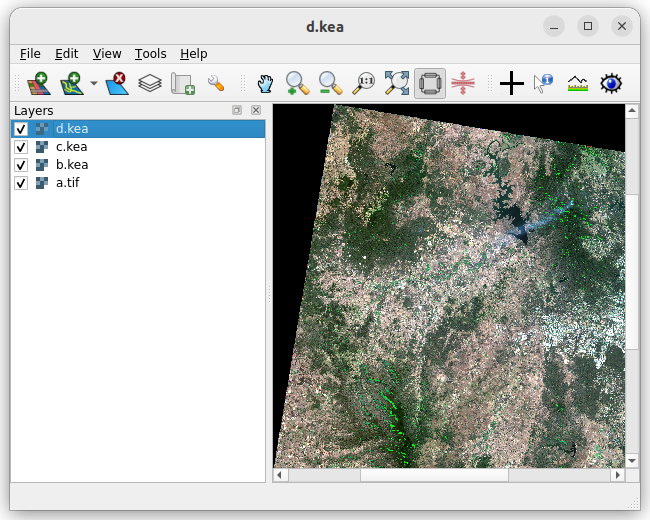
window. For example, if you start TuiView with some files but without the
button to access the Layer Window. This shows all the files that are loaded in the current
window. For example, if you start TuiView with some files but without the --separate flag
you get them loaded on top of one another:
tuiview a.tif b.kea c.kea d.kea
The  button can be used to toggle the state of the top layer. The comma (,) and full stop (.) keys on the keyboard
can be used to move forward and back through the images like they are a timeseries.
button can be used to toggle the state of the top layer. The comma (,) and full stop (.) keys on the keyboard
can be used to move forward and back through the images like they are a timeseries.
The tick boxes next to each file in the Layer Window can be used to turn individual files on and off. In addition, if you right-click on a file there is a context menu that can be used to access other functionality such as moving files up and down in the stack, removing them and editing their stretch.
Files can be locked so that any new files opened appear below them (most useful for vector layers - see below).
Top layers are removed the Remove Layer ( ) button
on the tool bar.
) button
on the tool bar.
Vectors
Vectors can be loaded by pressing the  button, or
loaded from the command line with the
button, or
loaded from the command line with the --vector flag (can be specified multiple times):
tuiview a.tif --vector soils_3577.gpkg
Note that usually TuiView will ask you the name of the layer to open. From the command line you
can suppress this by specifying the layer name in the --vectorlayer option. Here is an example of
how vectors are shown by default in TuiView, with the context menu from the Layer Window for the
vector on top:
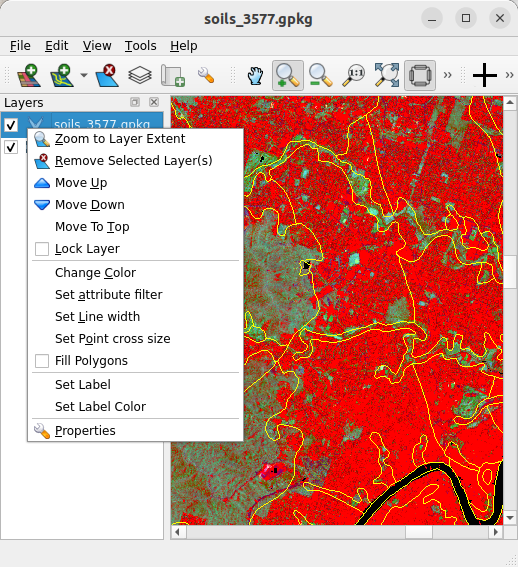
Note that there are options here to change the colour used, the attribute filter, line width and to show labels among other things.
It is important to note that TuiView expects to have a raster layer open before you add a vector. You may find strange behaviour if you do not load a raster layer in a window first. This is because TuiView is primarily a raster viewer and needs a raster to define its view of the world.
Conclusion
TuiView is a modest package but does have many features of more complex GIS packages, plus some extras. This post has covered the basics of viewing images in TuiView. Another post will have details of how to query raster and vector data.